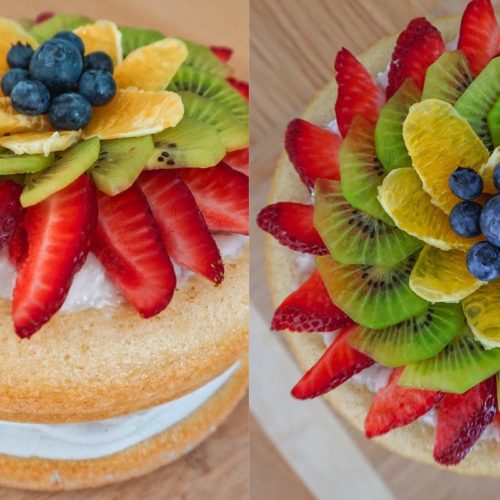
Fruit Tart Cake
This fruit tart cake is easy to make, oil free, and perfect to make for Mother‘s Day! I highly recommend using the freshest fruit you can find, whatever is in season!
Print
Pin Me!
Servings: 1 cake
Ingredients
Vanilla Cake
- 1¾ cup Flour
- 1 cup Sugar
- 1 tsp Baking Powder
- ¾ cup Almond Milk
- ¼ cup Lemon Juice
- 2 tsp Vanilla Extract
- 1 tbsp Apple Cider Vinegar
Coconut Whip Cream
- 1 can Full-Fat Coconut Milk
- 1 tsp Vanilla Extract
- 1 tbsp Agave Nectar or maple syrup
Custard
- ¼ cup Cornstarch or arrow root powder
- ¼ cup Sugar
- 1¾ cup Almond Milk
- 1½ tsp Vanilla Extract
Toppings
- Strawberry
- Kiwi
- Orange
- Blueberry
Instructions
Prep
- Place the can of coconut milk in the refrigerator overnight.
Vanilla Cake
- Preheat oven to 350°F and prep your 2 pans by buttering the inside first and then adding just enough flour to coat the entire bottom and sides of the pan.
- In a large bowl, combine the dry ingredients (flour, sugar, baking soda).
- In a medium bowl, combine the wet ingredients (milk, lemon juice, vanilla extract, apple cider vinegar).
- Making a slight hole in the dry ingredients, pour the wet ingredients in slowly. Being to mix by hand slowly by using a spatula and circling the perimeter of the bowl and then pulling the spatula down the middle towards you. Continue this motion until fully incorporated (this allows the air to remain in the mixture).
- Split the mixture evenly between the two pans and quickly place in the oven (the mixture of the baking soda and vinegar is crucial is helping the cake rise, but you want this to occur in the oven).
- Bake for 25-30 minutes until golden brown and then remove cakes from pans and let them cool completely on a wire rack.
Coconut Whip Cream
- Place a ceramic, glass, or metal mixing bowl into the freezer for 10-15 minutes.
- Take the bowl out of the freezer and take out the can of coconut milk from the refrigerator.
- Remove the solid white parts from the can and place in the bowl (you can save the liquid part and use it in your coffee or smoothies later).
- By hand or with an electric hand mixer whip the coconut milk solids for 5-10 minutes until desired consistency, then add vanilla extract and agave and mix until incorporated.
- Place in refrigerator until it’s time for decoration.
Custard
- If the cakes are not fully cool yet, place them in the refrigerator to make sure they are completely cooled before starting the custard recipe.
- Using a medium saucepan, whisk the cornstarch and sugar together.
- Slowly add in and whisk 1/3 c of the almond milk to prevent any clumps and then add the rest of the almond milk once the cornstarch is dissolved with the vanilla extract.
- On medium-high heat whisk the mixture until bubbling begins and the mixture begins to thicken like gravy, then turn down the heat to medium-low and switch to using a spatula.
- Gently simmering, continuously scrap the sides and bottoms for 7-10 minutes until the custard can hold its shape for a few seconds.
Assembly
- Remove the cakes and coconut whip cream from the refrigerator.
- Either spreading or using a pipet, place the whip cream around the perimeter of the bottom cake layer as if you are building a wall.
- Then add the custard into the middle of the whip cream circle you just created.
- Now spread a thin layer of custard on the top of the top cake layer and place both cakes back in the refrigerator to set for 5-10 minutes.
- In the meantime, cut up your fruit however your heart desires (this is the fun part!).
- Finally, remove the cakes from the refrigerator and start assembly by placing the top cake layer on top of the bottom cake layer (I used toothpicks to help secure the structure).
- Last but not least, add your fruit on top in the cool pattern you created!
Tried this recipe?Mention @nuttinelli or tag #nuttinelli!